
Blog
How to Choose Spill Kit Size for Your Site
Aug
A 20 litre fuel leak beside a delivery truck can overwhelm a small vehicle bag quickly. On the other hand, placing a large wheeled kit in every service van wastes space and budget. Knowing how to choose spill kit size means matching the kit to the largest credible spill your crew may need to contain before help, cleanup contractors, or additional supplies arrive.
Start with the liquid, the volume, and the place where it could escape. Then choose a kit with enough absorbency for the spill, plus a practical buffer for socks, contaminated waste, and a second minor incident before the kit can be refilled.
How to Choose Spill Kit Size From Real Spill Risk
Do not size a spill kit around the smallest drip your team sees every day. Size it around the largest credible release in that work area. A workshop may handle a few litres during an oil change, but a damaged 205‑litre drum, failed hose, or tipped container may be the event that tests the kit.
Walk the site and look at what is actually stored, transferred, fueled, repaired, or transported. Check container sizes, hose connections, pumps, drain locations, and vehicle tanks. Ask a direct question: if the largest container in this area leaked before anyone could shut it off, how much liquid could reach the floor?
A spill kit does not always need to absorb the full capacity of the largest container. Fast isolation may stop a release after only part of the contents escapes. But assuming every leak will be caught immediately is a poor plan. Choose capacity based on credible loss volume, not best-case response time.
Use this simple starting calculation:
Required absorbency = credible spill volume + 25% to 50% response buffer
The buffer matters because absorbents may be used to build a containment perimeter before cleanup begins. Pads also lose some practical capacity on rough concrete, under equipment, and when crews need extra material to wipe down surfaces.
For example, if a maintenance bay could reasonably release 76 litres of oil, select at least an 80‑litre oil and fuel kit. If it sits next to a drain or a sloped driveway, move up another size and add dedicated drain protection. Preventing liquid from leaving the work area is often more valuable than having a few extra cleanup pads afterward.
Match the Kit to the Liquid
Kit size is only half the decision. The absorbent media must suit the material being spilled.
Oil and fuel spill kits are designed for hydrocarbons such as diesel, gasoline, engine oil, hydraulic fluid, and lubricants. Their hydrophobic polypropylene absorbents repel water, making them useful around wash bays, outdoor fueling areas, docks, and wet pavement. They absorb oil while floating on water, but they are not the right choice for acids, caustics, solvents, or unknown chemicals.
Chemical or hazmat spill kits use more chemically resistant absorbents for acids, bases, coolants, solvents, and other hazardous liquids. If your site handles multiple chemical types, consult the safety data sheet and choose media compatible with the likely substances. A larger general kit is not safer if the absorbent material is unsuitable for the chemical involved.
General purpose spill kits suit non-aggressive everyday liquids, including water-based fluids, coolants, and some workshop chemicals. They are a practical fit for warehouses, maintenance areas, and indoor facilities where oil-only media is too limited and full chemical compatibility is not required.
For unknown liquids, treat the event cautiously. Keep people away, identify the product from labels or shipping documents, and use the correct site escalation procedure. No spill kit should be used as a substitute for emergency response equipment where a dangerous chemical release is possible.
Use Kit Capacity That Fits Each Work Area
A good spill response plan rarely relies on one large kit at the far end of the building. Smaller, correctly placed kits get used faster, while larger units provide coverage where bulk liquids are handled.
| Work area or use | Typical starting capacity | Practical setup |
|---|---|---|
| Service van, pickup, or light fleet vehicle | 15L | Compact bag or case within reach of the driver |
| Heavy truck, fuel delivery vehicle, or field plant | 30L | Vehicle kit plus drain cover and extra absorbent socks |
| Small workshop bay or warehouse work zone | 50L | Wall-mounted or portable kit near the likely leak point |
| Fuel storage, drum handling, wash bay, or loading area | 80L | High-capacity kit with containment tools and waste bags |
| Bulk storage or high-volume transfer point | 240L | Wheeled kit supported by site-specific emergency controls |
These are starting points, not fixed rules. A 50‑litre kit may be enough for a single forklift battery charging zone with limited fluids. The same kit is too small beside multiple drums or a transfer pump. Increase capacity when there is a direct path to drains, soil, waterways, public areas, or occupied work zones.
For large sites, place kits where the response starts, not only where stock is stored. Put a kit near the loading dock, fuel point, workshop entrance, chemical cabinet, and maintenance bay if those areas carry separate risks. A crew should not need to cross a spill to collect its response equipment.
Consider Container Style and Deployment Speed
The container changes whether a kit is useful in the first minute. A 15‑litre bag may fit behind a truck seat, while a 240‑litre wheeled bin belongs beside a drum store or loading zone. Select the format your crew can move, open, and deploy without delay.
Vehicle kits need compact packaging, clear labeling, and absorbents that can handle the fluids carried or serviced by that vehicle. Keep the kit secure so it remains accessible after hard braking, rough roads, or a minor collision. Fleet operators should also check kits during scheduled vehicle inspections, not only after a spill.
For workshops and depots, a wheeled kit makes sense when the likely spill area is broad or when the kit must cover several bays. However, wheels are not a reason to park the kit in a distant storeroom. Position it near the risk, with a clear access path that is never blocked by pallets, tires, or parked equipment.
Account for Containment, Waste, and Refills
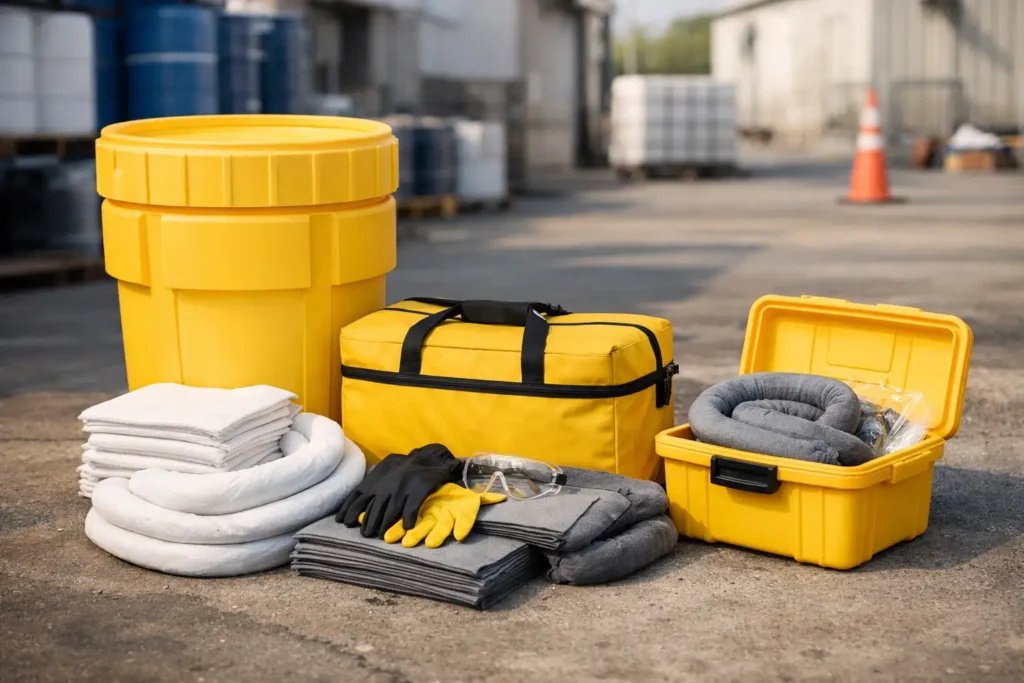
Absorbency ratings do not tell the entire story. A usable kit needs socks or booms to stop spread, pads for recovery, disposal bags for contaminated material, and personal protective equipment appropriate to the task. A kit loaded only with loose absorbent may soak up liquid, but it can be slow to deploy around a drain or beneath a leaking vehicle.
For areas with storm drains, keep drain covers or drain seals close by. A spill that enters drainage can turn a manageable cleanup into a costly incident. If outdoor runoff is a possibility, increase kit capacity and make containment the crew’s first action.
Refills are part of sizing, too. A 120‑litre kit that has used half its pads is no longer a 120‑litre response resource. After every incident, inspect the contents, remove used items, and replace them immediately. Keep spare pads, socks, bags, and gloves in high-use locations so a minor cleanup does not leave the main kit depleted.
Run a Quick Spill Kit Sizing Check
Before ordering, confirm four operational details:
- Identify the largest credible spill volume, not the average drip.
- Select absorbents compatible with the fluids handled in that area.
- Add 25% to 50% capacity for containment, uneven surfaces, and cleanup margin.
- Place the kit where the spill is most likely to occur and refill it after use.
If your operation has separate risks, equip each one properly. A vehicle oil and fuel kit, a chemical kit near process fluids, and a larger wheeled unit at the loading zone can be more effective than one oversized kit stored centrally.
The right spill kit size is the one your crew can reach immediately, deploy confidently, and use without running short before the liquid is contained. Build that margin into every vehicle, bay, and transfer area, then keep replacement absorbents ready for the next shift.