
Blog
Oil Spill Kit for Workshop Sizing Guide
Aug
A leaking sump plug, split hydraulic hose or overturned waste-oil container can put a workshop bay out of action quickly. The right oil spill kit for workshop use gives your crew a clear first response: contain the liquid, protect nearby drains, absorb it safely and collect the waste without hunting through the storeroom for loose supplies.
For most mechanical, fleet and maintenance workshops, Oil & Fuel absorbents are the practical starting point. They are designed to pick up hydrocarbons such as engine oil, diesel, petrol, lubricants and hydraulic fluid while repelling water. That makes them suitable for indoor bays, wash-down-adjacent areas, yards and outdoor service zones where rainwater may be present.
Start with the spill risks in your workshop
Do not size a kit around the smallest drip your team sees every day. Size it around the most likely spill that could spread beyond a drip tray before staff can intervene. Look at the fluids handled on site, the largest container routinely opened, the number of service bays and how close drains are to oil storage or vehicle work areas.
A tyre and mechanical workshop may deal mostly with engine oil, transmission fluid, coolant and small fuel leaks. A fleet depot may also handle larger volumes of diesel, hydraulic oil and grease across multiple vehicles. A maintenance shed with plant equipment may need to account for burst hoses or leaks from 205L drums.
Oil & Fuel kits are the right fit where hydrocarbons are the primary risk. They are not a substitute for a Chemical/Hazchem kit where acids, solvents or unidentified chemicals may be involved. If your crew handles both, keep the kits clearly separated, labelled and positioned where the relevant work takes place.
Match the kit to the fluid, not the container colour
An absorbent labelled for oil and fuel is useful for common workshop hydrocarbons, but product selection still depends on the liquid. Coolant, degreaser and some cleaning products may need General Purpose or Chemical absorbents instead. Check the product label and safety data information for fluids used in your workshop, then equip each area accordingly.
Using the wrong media can slow the response and leave staff unsure of what to do. Clear kit labels and a simple spill response instruction inside the cabinet remove that hesitation.
Choose the right oil spill kit capacity
Capacity is the total volume a kit can absorb under suitable conditions. It is a planning figure, not a reason to let a spill reach the kit’s full limit. Socks, pads and loose absorbent are used for different jobs, so a kit with the right mix is often more useful than a kit with a high headline litre rating alone.
| Workshop situation | Practical starting capacity | Suitable kit format |
|---|---|---|
| Mobile mechanic, ute or service van | 15L to 30L | Compact bag or carry case |
| One or two light-vehicle bays | 50L to 80L | Portable bag, bin or cabinet kit |
| Busy mechanical workshop or wash bay | 120L | Wheelie bin or larger cabinet kit |
| Fleet depot, heavy vehicle shed or drum storage area | 120L to 240L+ | Wheelie bin kit with additional absorbent stock |
A 20L kit is a useful vehicle response kit. It can manage a small leak at a customer site or on the road, and it stores easily behind the driver’s seat or in a service body. It is not enough as the only spill resource for a workshop with several hoists, oil drains and bulk-fluid storage.
For a typical workshop, a 50L or 80L kit gives a credible first response for everyday leaks and minor container spills. Once you operate several bays, service heavy vehicles or keep drums on site, step up to a 120L or 240L wheelie bin. The bin format is easy to spot, simple to move to the spill and roomy enough to hold used absorbents for controlled disposal.
If you are between sizes, choose the larger kit where the cost of downtime is high. A kit that is partly used after one incident may not cover the next leak on the same shift.
What a workshop kit should contain
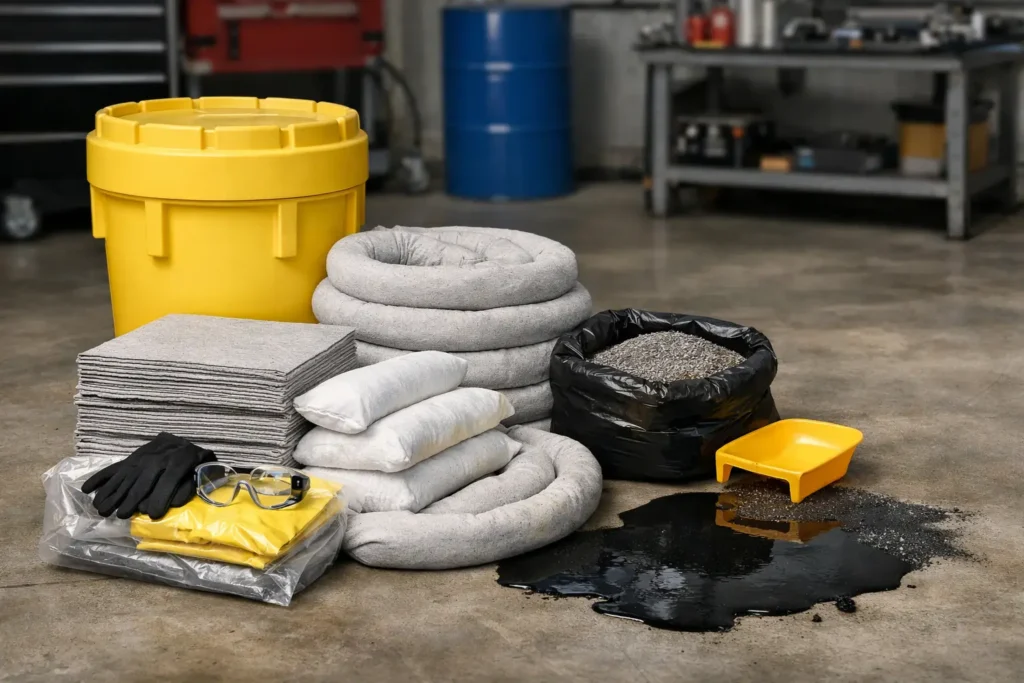
A ready-to-deploy kit should help the crew control a spill in the right order. Socks or booms form the first line of defence by stopping liquid from spreading under benches, towards roller doors or into a drain. Pads then absorb the pooled oil, while loose absorbent can deal with uneven floors, cracks and hard-to-reach areas.
Your workshop oil kit should also include PPE, disposal bags and ties, plus a clear instruction sheet. These components turn absorbent material into a workable response system. Without bags, for example, used pads can sit around the bay and create a second housekeeping issue.
For sites with exposed drainage, keep drain protection close to the likely spill path rather than at the opposite end of the workshop. A drain cover or drain warden can be placed over a clean, dry drain before oil reaches it. This is especially useful near wash bays, fuel delivery points, loading areas and workshop entrances where rain can carry a spill across the floor.
Put the kit where the spill starts
A spill kit locked in an office is effectively out of reach during the first few minutes. Position kits near service bays, waste-oil tanks, bulk lubricant storage, parts-washing areas and vehicle entry points. Keep access clear and make sure every shift knows the location.
For a larger workshop, one central 240L kit may be supported by smaller 20L or 50L kits in high-risk zones. This approach reduces response time without filling every corner with duplicated equipment. Fleet operators should also stock each truck, van or ute with a vehicle-sized kit matched to the fluids carried and the work performed.
Set up a response process your crew will use
A complicated procedure gets ignored when a vehicle is waiting on a hoist and oil is moving across the floor. Give staff a short, repeatable sequence: stop the source if safe, protect the drain, contain the spill, absorb the liquid, bag the used material and report the incident.
Train the team with the actual kit they will use. Show them how to place socks in a curve downhill from the spill, rather than dropping pads directly into spreading oil. Demonstrate where PPE and disposal bags are stored. A five-minute toolbox talk after a kit arrives can prevent wasted material and confusion later.
For larger releases, hazardous materials or any situation that cannot be safely controlled by on-site staff, isolate the area and follow your emergency escalation process. A spill kit supports fast first response. It does not make every spill a routine clean-up job.
Keep refills ready after every spill
The common failure is not buying the wrong kit. It is leaving a used kit half-empty because the incident was considered minor. If pads, socks or disposal bags have been used, replace them promptly and record what was consumed. This keeps the kit ready for the next shift rather than merely present on site.
Keep spare oil-only pads and absorbent socks in workshops with frequent servicing work. These are the components used fastest during small leaks and maintenance tasks. A refill pack is generally more economical than replacing the entire container, provided the bin, bag or cabinet is still clean, labelled and fit for use.
Build a quick monthly check into the supervisor’s inspection routine. Confirm the kit is visible, accessible, dry, complete and appropriate for the fluids currently handled on site. Check that vehicle kits have not been removed for a job and forgotten in a different van or storeroom.
Select the right kit before the next leak
The best time to choose a workshop spill kit is before a hose fails or a drum is knocked over. Start with the largest realistic spill, choose Oil & Fuel media for hydrocarbons, add drain protection where runoff is possible and keep refill absorbents on hand for everyday use.
Equip the bays your crew works in, stock your vehicles for mobile jobs and make the kit easy to reach. When oil hits the floor, a ready kit lets your team act immediately and get the workshop moving again.