
Blog
Chemical Spill Response Checklist for Worksites
Aug
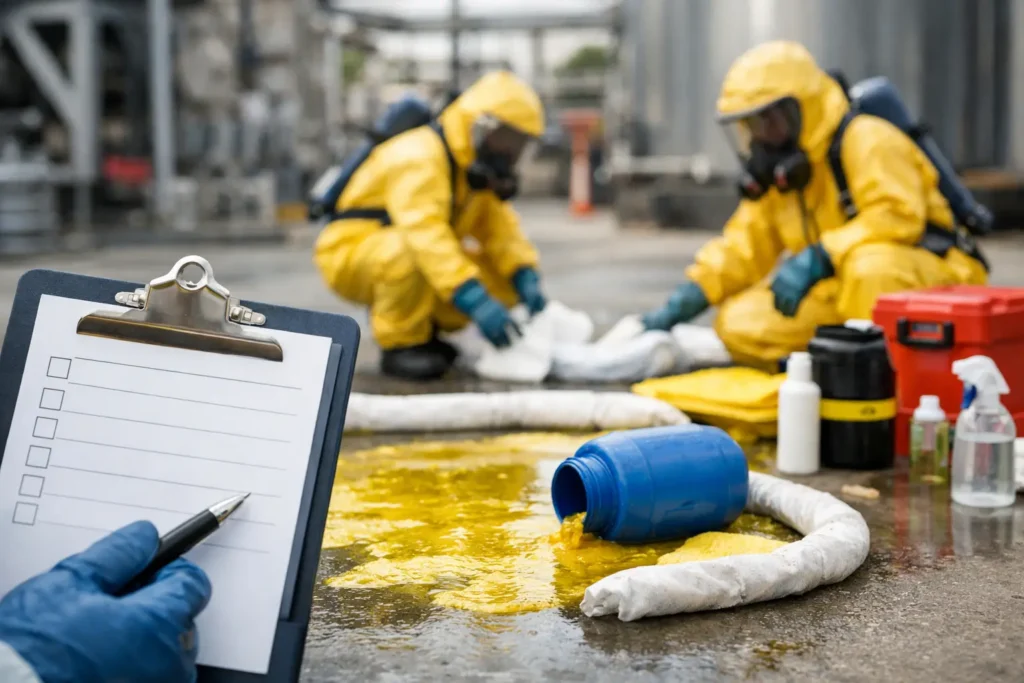
A leaking drum beside a workshop drain can become a much bigger problem in minutes. This chemical spill response checklist gives supervisors, depot managers and crews a clear order of action: protect people first, stop the spread, contain the liquid, then clean up safely. The best response is not complicated, but it depends on having the right equipment within reach and staff who know when a spill is beyond their capability.
Chemical spill response checklist: act in the right order
Use this checklist for minor, manageable chemical spills where trained site staff can respond safely. If there is fire, fumes, a highly reactive substance, an unknown chemical, a large release, injury, or the spill is moving off-site, stop work, isolate the area and escalate to emergency services or your hazardous materials response provider.
For an on-site spill, work through these actions without rushing past the first steps:
- Identify the substance. Check the container label, Safety Data Sheet (SDS), workplace register and any transport documentation. Confirm whether the liquid is corrosive, flammable, toxic, oxidising or otherwise hazardous. Do not assume a clear liquid is harmless.
- Raise the alert and isolate the area. Keep unprotected people out. Shut down nearby ignition sources where flammable vapours may be present, and prevent forklifts, vehicles and foot traffic from spreading contamination.
- Put on suitable PPE. Gloves alone may not be enough. Select chemical-resistant gloves, eye protection, protective clothing and respiratory protection only where the SDS and your procedures require it. PPE compatibility matters – the wrong glove material can break down quickly.
- Stop the source if it is safe. Upright a fallen container, close a valve, plug a small leak or place the damaged package into an overpack. Never put yourself in the spill path to save product.
- Protect drains and waterways immediately. Cover nearby grates before the spill reaches them. A drain cover, drain warden or temporary bund can prevent a clean-up job becoming an environmental incident.
- Contain the liquid. Place absorbent socks or booms around the outside edge, working from the perimeter inward. For a sloping floor, build containment downhill first.
- Absorb and collect. Use compatible absorbent pads, loose absorbent or pillows to soak up the contained liquid. Avoid sweeping or washing the spill toward a drain.
- Package waste securely. Place used absorbents, contaminated PPE and damaged containers into compatible bags, drums or disposal containers. Label them clearly as contaminated waste.
- Decontaminate and inspect. Clean the affected surface using the method specified by the SDS and site procedure. Check drains, cracks, equipment wheels and nearby stock for residue.
- Report, restock and review. Record what happened, the material involved and the waste outcome. Replace every item used before the next shift.
This sequence is simple by design. In a busy workshop or loading area, a clear response order prevents crews from reaching for pads while a spill is still running into a drain.
Check the SDS before choosing absorbents
A chemical spill kit is not interchangeable with an oil and fuel kit. Oil and fuel absorbents are usually hydrophobic polypropylene, meaning they repel water and selectively absorb hydrocarbons. They are an efficient choice for diesel, petrol, lubricants and oils, including spills near water. They are not the automatic answer for acids, caustics, solvents or other hazardous liquids.
For unknown liquids or common workplace chemicals, use chemical or hazchem absorbents rated for the materials stored and handled at your site. These are commonly yellow for quick identification, although colour is not a substitute for checking compatibility. Strong oxidisers, highly reactive products and certain solvents can require specialist advice and specific neutralisation or containment procedures.
The SDS tells your team the key details: health hazards, flammability, required PPE, incompatible materials, first-aid requirements and disposal considerations. Keep current SDS access close to the work area, not locked away in an office folder no one can reach during a spill.
A practical rule applies: if the label is missing, the liquid is reacting, vapours are causing discomfort, or staff cannot confirm the right response media, treat it as an escalation event. Contain from a safe distance where possible, protect drains and get competent support.
Select the right kit capacity for the location
The right spill kit size is based on credible spill volume, not the smallest kit that fits the budget. Start with the largest container, hose, battery system or transfer point likely to fail in that area. Then consider how quickly a leak could spread before someone notices it.
For a service ute, van or delivery vehicle carrying small containers, a compact 20L or 30L chemical spill kit can provide immediate first response. It should be secured where the driver can reach it quickly, not buried under tools. A vehicle kit is for controlling a small leak and protecting the roadside drain while further assistance is arranged if needed.
A workshop handling drums, parts washing chemicals or bulk additives generally needs a larger response capacity. A 120L or 240L wheeled chemical spill kit is easier to deploy across a concrete floor and provides enough socks, pads and waste bags for a meaningful release. Position it near chemical storage, decanting points and workshop entrances, without blocking access or placing it inside the likely spill zone.
For warehouses and depots, one large kit may not be enough. A kit at the chemical store does little good if the leak occurs at the loading dock 150 metres away. Place equipment at each risk point: storage, receiving, decanting, maintenance bays and external drains. Smaller grab bags can support first response while the main kit is brought in.
Capacity also has a practical trade-off. A 240L kit offers more absorbency, but it can be too bulky for a compact vehicle or tight plant room. Match the format to the location: bag for vehicles, cabinet for fixed indoor points, and wheelie-bin style kits for large, mobile site response.
What a ready-to-deploy chemical kit should contain
A workable kit needs more than absorbent pads. It should give the crew a way to stop migration, collect waste and protect themselves. Check for compatible pads or loose absorbent, absorbent socks or booms, disposal bags and ties, PPE, instructions and a clear label identifying it as chemical or hazchem response equipment.
Drain protection is worth treating as a separate priority. Pads absorb liquid only after it reaches the floor. Drain covers and portable bunding buy valuable time at the point where a spill can enter stormwater. Keep them visible and easy to lift, particularly around loading docks, wash bays and outdoor chemical storage.
Set up the area before a spill happens
Spill readiness is mostly a housekeeping job. Label chemical storage clearly, keep containers closed, inspect taps and drum pumps, and use bunding under stock that could leak. Store chemicals away from drains where practical, and ensure rainwater cannot carry a release out of an external storage area.
Give each shift a short, repeatable briefing. Staff should know where the spill kits are, which kit suits which liquid, where the drain covers are kept and who to call. They do not need a lengthy theory session to understand the first actions: alert others, check the substance, put on PPE, stop the source if safe and protect the drain.
Run a simple drill using an empty container and a marked mock spill. Time how long it takes to find the kit and cover the nearest drain. This often reveals the real problem: the kit has been moved, the PPE is missing, or the absorbent socks were used months ago and never replaced.
Restock after every use, not at the next audit
Minor spills are where kits quietly get depleted. A few pads used under a leaking drum, a pair of gloves taken for another task, or a drain cover stored in the wrong shed can leave a site exposed when the next incident occurs. Make kit checks part of routine inspections and after-use reporting.
Check that packaging is intact, PPE is serviceable, instructions remain readable and absorbents are dry and accessible. Replace used components with like-for-like chemical response refills rather than mixing random pads from different kits. If your operations have changed – larger containers, new chemicals or additional vehicles – reassess the capacity as well.
Chemical spill waste must be handled according to the SDS, local requirements and your waste contractor’s acceptance conditions. Absorbent material that looks dry may still be classified as contaminated waste. Do not place it in general rubbish or wash residues into a drain simply because the visible spill has gone.
Keep the checklist at the kit, keep the kit where the risk is, and keep replacement components on hand. That is how a fast response becomes routine rather than a scramble when a drum leaks or a container tips.